Follow these steps to enable .Net Framework feature using Role Management Tool:
1. Launch Start Menu. Go to All Programs -> Administrative Tools -> Server Manager. (Alternatively you can launch the server Manager by typing ServerManager.msc at Run prompt.)
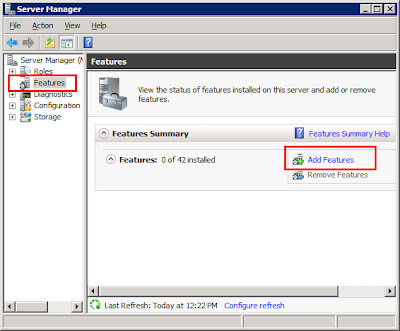
2. In the Server Manager console, on the left hand side click on Features. It will show you Features Summary window.
3. On the right hand side you will find Add Features blue colored link. Click on that. It will launch the Add Features Wizard.
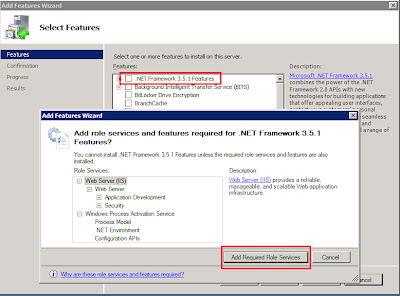
4. On the Add Feature Wizard select .Net Framework 3.5.1 Features. It will launch a dialog for Add role confirmation. Click on Add Required Role Service.
5. Clicking on Next will take you to Introduction to Web Server(IIS) page, click on Next here.
6. Now on Role Services Page you can select services you want. Don’t click on anything here keep all defaults. Click Next.
7. It will show Install Confirmation page. Click on install and wait till install finishes. It will install the selected features and when if finishes click on close.
Now you can start installation of your product. These steps are verified on Windows 2008 R2 operating system.


No comments:
Post a Comment