How to disable task manager in Windows 7

Simply by setting a registry value you can disable task manager in Windows 7. Before modifying the registry key be sure you are aware of how to modify the registry values. 

Open a registry editor then navigate to 
HKEY_CURRENT_USER\Software\Microsoft\Windows\CurrentVersion\Policies\System 


Check if registry DWORD value is present with name "DisableTaskMgr". If not then please create the DWORD value with name "DisableTaskMgr". Set its data as 1 to disable the task manager. 


To revert the changes you can set DisableTaskMgr to 0.  

Search Internet from the Start Menu in Windows 7


You might be aware that Windows 7 allow to search for application or file from Start menu itself.  Windows 7 also facilitate you to search the internet.


You can enable this feature using group policy editor. Open a Local Group Policy Editor by typing "gpedit.msc" in Run Command from Start Menu. You can also find the Local Group Policy Editor by searching for "Group Policy" in Start Menu.  

Once Local Group Policy Editor is opened traverse to User Configuration -> Administrative Templates -> Start Menu and Taskbar as shown in below image. 


In the right pane, enable he policy "Add Search Internet link to Start Menu". 


Now go to Start Menu and type what you want to search on internet in Start Menu, start menu will show you the link to search. Once you click the link it will launch the search item as per your computers default web-browser. 


This feature is also supported in Window 2008 operating system. 

How to disable Right Click menu on Windows Desktop

With a simple trick you can disable the Right click menu on the desktop for Windows operating system. This trick works for Windows XP, Windows 7 and Windows 2008 also.


You will need to modify a registry value for this. Before modifying the registry key be sure you are aware of how to modify the registry values. 


Open a registry editor then navigate to "HKEY_CURRENT_USER\software\Microsoft\Windows\CurrentVersion\Policies\Explorer". 

If a DWORD value with name "
NoViewContextMenu" is not present then create a DWORD value having name "NoViewContextMenu". Set its value to 1. 


Setting its value to 1 will not show the context menu on right clicking on Windows  desktop. You can set value to 0 if you want to revert the changes.

To reflect the changes you will need to restart or at least log off your computer. 

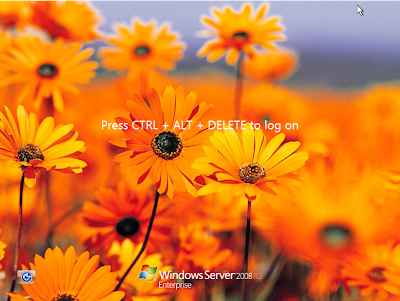
Changing Windows logon Screen in Windows 7 and Windows 2008 R2

Windows 7 and Windows 2008 R2 provides the easiest way to change the Logon Screen. 
You just have to set registry value and copy the image in perticular directory and you are done.  


Follow these steps to setup the logon screen you wish to see: 

  • Open Registry Editor, by entering "regedit" in Run command.
  • Once Registry Editor is opened, under Computer  node navigate to HKEY_LOCAL_MACHINE -> Software -> Microsoft -> Windows -> CurrentVersion -> Authentication -> LogonUI -> Background . 
  • Check if DWORD value having name OEMBackground is present if not then using right click create DWORD value named  OEMBackground.  
  • Set the data for OEMBackground as 1.
  • Now copy the background image you want to see as Logon screen at location:  %windir%\system32\oobe\info\backgrounds. Here %windir% is the Windows directory path. If above directory is not present then you will need to create it.  
  • The background image you copied should be renamed to "backgroundDefault.jpg" and it should not be of more than 256KB in size, else it wont display.
  • Now just log off and you can see the changed logon screen, if you dont see the new logon screen then try rebooting your machine.  
One thing to note here is that that once you have custom logon screen, the setting may be reset if you change the Windows Theme. This behavior can be controlled using Group Policy options below.Use the following steps to enable a custom Logon Screen background: 
  • Open a Group Policy editor by entering "gpedit.msc" in Run command.
  • Under Computer Configuration navigate to "Administrative Templates" -> "System"-> "Logon".
  • Enable the policy "Always use custom Logon background".
This changed Logon Screen will not be displayed if you try to login using remote desktop connection. The remote desktop connection will display the default logon screen it has. 

Quick Launch toolbar in Windows 7

If you have observed, Quick Launch toolbar is not supported in Windows 7 and Windows 2008 also. When you right click on the taskbar, under Toolbars menu you wont find the "Quick Launch". 


Windows 7 allows you to pin shortcut icons directly into the taskbar, which was the functionality provided by the Quick Launch, hence having quick launch toolbar is redundant. But some people might be interested in Quick Launch toolbar, they can use this technique/workaround provided by Microsoft to enable the Quick Launch toolbar. 
The Quick Launch toolbar enable by this workaround will not be exactly similar to the earlier Windows version Quick Launch toolbar. This will be a Toolbar as you create a new toolbar using a folder having some shortcuts. 

Follow below steps to enable the Quick Launch toolbar: 

  • Right-click the taskbar, Select Toolbars-> New Toolbar. 
  • It will launch the Choose Folder dialog, where you can choose folder for the toolbar. In this dialog box, in the Folder text box, type  %userprofile%\AppData\Roaming\Microsoft\Internet Explorer\Quick Launch, and then click OK
Once you do this your taskbar will show up the Quick Launch toolbar as below image (on Windows 2008 ) 

Note: %userprofile% will resolve to your(users) home directory.

Hiding data using God Mode in Windows 7

If you want to hide some data in folder so that other users should not be able to search or see the data, then you can use this technique instead of installing any product to do this task.  


First copy the data you want to hide in a single folder. Then rename the folder the way you create the God Mode


This way on double clicking the folder others will get access to god mode but not the data placed inside the folder. 


To get the data inside the  folder ( now a God mode)  you just select the folder(God Mode icon) and right click.


Right clicking the folder give different options, select Send to -> Compressed (Zipped) folder. 
It will create zip file of your folder.


Once you double click the zip file you can see or extract the data from the folder. 


Related Posts:

Remove Items From Ctrl+Alt+Delete Windows Dialog

Pressing [Ctrl]+[Alt]+[Delete] on windows computer, shows you dialog which contains:

  • Lock Computer
  • Switch User
  • Log Off
  • Change Password
  • Start Task Manager
  • Shutdown

You can remove Lock Compute, Log Off, Change Password, Start Task Manager from above options. This is also depend on the Group policy that is applied on your domain, if your computer is part of some domain.


To remove the options you will require to open the Group Policy Editor, that you can open by typing "gpedit.msc" in Run Command from Start menu.


Once Group Policy Editor is opened  navigate to "User Configuration" ->  "Administrative Templates" -> "Network" -> "System" Now select Ctrl+Alt+Del Options from the list.


On the right site pane right click on any of the given items, select Properties and check the box named 'Enabled'. Press Apply on properties dialog. Log off and log on the computer to reflect the change.


One thing to note that if you remove the "Lock Computer" from the dialog, you will not able to lock the computer by pressing "Windows + L" key.

God Mode in Windows 7


If you are interested in shortcut for functions in Action Center, the Network and Sharing Center, Power Options, Troubleshooting tools, User Accounts and other at one place then you will require Windows God Mode. 


The God Mode actually does not offers new features or expose new settings. It only list tasks that we have to otherwise search in Control Panel or Start Menu of Windows 7 or Vista.


The God Mode can be accessed in two ways:


Method 1:


Simply type in shell:::{ED7BA470-8E54-465E-825C-99712043E01C} in the address bar of windows explorer. It will open up the windows named "All Tasks", where all the shortcuts for functions are listed. 


Method 2:


Create a new folder and rename it to GodMode.{ED7BA470-8E54-465E-825C-99712043E01C}. As soon as you rename the folder the name part after dot will get disappear and also icon of the folder will also get changed like control panel. 


In both the methods, the name part after dot or colon, ED7BA470-8E54-465E-825C-99712043E01C, must be entered exactly as it is here, including the curly brackets.


The God Mode lists around 284 shortcuts in Windows 7, and 212 shortcuts in Windows Server 2008 R2. God mode even works with Windows Vista as well. But this trick is incompatible with Windows Vista 64 bit.  


It might happen that you may get trouble while trying this trick on 64 bit Windows Vista version, your explorer will restart again and again. If you face this proble then you can overcome this in two ways:

  1. Restart the computer in Safe Mode with command prompt option. This will give you flexibility of running command without opening explorer. Now on command prompt traverse to the directory where you have created the God Mode folder. Now type the command  RD /S /Q “GodMode.{ED7BA470-8E54-465E-825C-99712043E01C}”. This will remove the specified directory. Now you can safely reboot your computer in normal mode.
  2. If you are able to access your computer from another computer then, go to another computer and browse to the location on your computer where you have created the God Mode directory and delete the GodMode folder.


You may also like :


multiple active firewall profiles in Windows 7.

Windows Firewall:


Windows Firewall was first time introduced in Windows XP SP2. All network connections goes through the firewall. You can set exceptions for programs you want to have network access. 
Windows Firewall settings are determined by the profile that you are using. Windows XP supports multiple firewall profile, but you can have only one profile active, even when you have multiple network adapters connected. 


Firewall in Windows 7:


Windows 7 and Windows Server 2008 R2 supports Private, Public, or Domain firewall profile that can be active  each network adapter that is most appropriate for the type of network to which it is connected.


This means that if you are at a outdoor with a wireless hotspot and connect to your corporate domain network by using a VPN connection, then the Public profile continues to protect the network traffic that does not go through the tunnel, and the Domain profile protects the network traffic that goes through the tunnel. 


This also addresses the issue of a network adapter that is not connected to a network. In Windows 7 and Windows Server 2008 R2, this unidentified network will be assigned the Public profile, and other network adapters on the computer will continue to use the profile that is appropriate for the network to which they are attached.


How to change the Firewall profile:


To change the firewall profile, launch the Windows Firewall from control panel -> System and Security -> Windows Firewall.  
In the Windows firewall you will find Advanced Settings. On the advanced Settings dialog you will find the Windows firewall properties and you can even modify the settings of the profile.

Easiest way launching frequently required programs in Windows 7

Windows Taskbar is is horizontal strip at the bottom of your desktop where your open files and programs appear. With Windows 7, the taskbar provides more functionality. Microsoft has rebuilt it and made it better than it was before. 


Windows 7 taskbar provides an exiting functionality to quickly launch applications, that are frequently needed. 


Pressing the Windows key plus a number key (for example, 1, 2, or 3) will launch the application that holds that position on the Taskbar. For example, press the Windows key + 1 to launch the first program icon on the Taskbar, and press the Windows key + 2 to launch the second program icon on the Taskbar. 

Hide what your browse using Internet Explorer InPrivate Browsing

With Internet Explorer, Microsoft has introduced a new term called "InPrivate Browsing". I will discuss here what is InPrivate Browsing, how to do it, what are the advantages of it. 


InPrivate Browsing 
Internet Explorer 8 InPrivate Browsing can help protect your privacy, by not storing history, cookies, temporary Internet files, or other data. This helps prevent anyone else who might be using your computer from seeing where you visited and what you looked at on the web.


While you are surfing using InPrivate Browsing, Internet Explorer stores some information—such as cookies and temporary Internet files—so that the webpages you visit will work correctly. However, at the end of your InPrivate Browsing session, this information is discarded.


Enabling InPrivate Browsing
You can open an InPrivate Browsing window,  click Safety ( Internet Explorer tool bar menu), Under Safety menu select InPrivate Browsing, as shown in image below. 


Alternatively you can press "Ctrl + Shift + P" to directly launch the InPrivate Browsing window. 
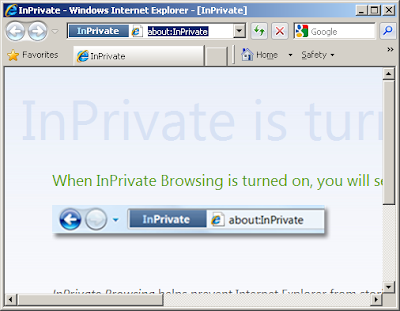
Additionally, you can open an InPrivate Browsing window by right-clicking the Internet Explorer 8 icon in the new Windows 7 taskbar, and then clicking InPrivate." The InPrivate Browsing window will be displayed as shown in image below.


InPrivate Browsing Advantages
You can use InPrivate Browsing to browse Web sites without leaving tracks or browse the Web on computers or networks that you don’t trust".


InPrivate Browsing Will not Prevent you from

  • someone on your network such as a network administrator or hacker from seeing where you went.
  • Hide from a website you visit because that websites might be able to identify you through your web address, and anything you do or enter on a website can be recorded by that website.
  • Any favorites or feeds that you add while using InPrivate Browsing will not get removed when you close your InPrivate Browsing session. Changes to Internet Explorer settings, such as adding a new home page, are also retained after you close your InPrivate Browsing session.


Locking your remote computer

Using simple VB Script you can lock your computer. Following is the code to lock the computer


 On Error Resume Next


Set objShell = CreateObject("Wscript.Shell")
objShell.Run "%windir%\System32\rundll32.exe user32.dll,LockWorkStation"


Now the challenge is, how can you use this script to lock the remote computer. This is pretty simple, using VB Script, copy this lock script to a remote computer, then execute the script on remote computer, this will lock the remote computer.


Const OverwriteExisting = TRUE

Set objFSO = CreateObject("Scripting.FileSystemObject")
objFSO.CopyFile "<LockScriptPath>", _
    "\\<Remote_computer_Name>\path_to_copy_file", OverWriteExisting

strComputer = "<Remote_computer_Name>"
Set objWMIService = GetObject _
("winmgmts:\\" & strComputer & "\root\cimv2:Win32_Process")

Error = objWMIService.Create _
    ("cscript path_to_copy_file", null, null, _
        intProcessID)

In Above code replace:
LockScriptPath: With the local machine path of lock script ( code given above)
Remote_computer_Name : Name or IP address of remote computer to lock.
path_to_copy_file : Path on remote computer where you can copy the lock script. 


Hiding "Run Command" from Start Menu

The Windows Start Menu contains many options. Usually every one does not require these menu items. 


You can easily get rid of some of the items from Start Menu, such as Run command, Control Pane, My Documents, Printer and Fax etc...


To remove items from Start Menu


  1. Right click on Taskbar, select "Properties".
  2. In Taskbar properties dialog, Select "Start Menu" tab.
  3. On Start Menu tab select the customize button. 
  4. On Window 7 you will get directly start menu customization options, on Windows XP, you will need to select Advanced tab.
  5. Here you will see the items displayed in Start Menu, deselect the items that you dont want to see on Start Menu.
  6. Press Apply and OK, you are done.


Hiding Navigation Pane/ Favorite Pane in Windows 7

Here I will explain you how can you hide the navigation pane in the explorer of Windows 7. 
To have a navigation pane on left hand side of window feels some time irritating. You can simply launch the explorer, by double clicking Computer from Start Menu.


Once Computer explorer is launched,  click on Organize menu item present at left top corner. 


Click Layout ->Navigation Pane to hide the navigation pane, some people call this Favorite menu. 


Click  Layout-> Details Pane to hide the details pane which display at the bottom of the explorer.   

Registry Trick : Rename the Recycle Bin

In any Windows Operating System, you will not find rename option for Recycle Bin. Just for fun if you want to rename the Recycle Bin, you can do it by some Registry Trick.

Before going ahead please ensure that you are fully aware of windows registry editor and consequences of modifying the registry incorrectly.  To have a backup of the registry follow steps mentioned in the link Backup & Restore Windows Registry.

Now if you are ready to rename Recycle Bin then follow these steps in order:
1. Copy following lines in notepad on your computer.

Windows Registry Editor Version 5.00


[HKEY_CLASSES_ROOT\CLSID\{645FF040-5081-101B-9F08-00AA002F954E}\ShellFolder] 
"Attributes"=hex:50,01,00,20 
"CallForAttributes"=dword:00000000

2.  Save the file with name as "RegistryChanges.reg". Don't forget that we are using extention .reg for saving.
3. Now double click the file "RegistryChanges.reg". This will add the above mentioned registry keys to your computer registry. Double clicking will launch the dialog box, click Yes  and you are done.
4. Now go to desktop and right click the Recycle Bin, you will find Rename option in right click menu. 

Now as you have renamed your Recycle Bin, you will want that no one should rename that to anything else. 
To do this you will require to revert the registry keys you have modified in step 3. Follow below steps to revert the value of registry keys.
1. Copy following lines in notepad on your computer.
Windows Registry Editor Version 5.00
[HKEY_CLASSES_ROOT\CLSID\{645FF040-5081-101B-9F08-00AA002F954E}\ShellFolder]
"Attributes"=hex:40,01,00,20
"CallForAttributes"=dword:00000040


2.  Save the file with name as "RegistryOriginal.reg". Don't forget that we are using extention .reg for saving.
3. Now double click the file "RegistryOriginal.reg". This will launch the dialog box, click Yes  and you are done.
4. Now go to desktop and right click the Recycle Bin, you will not find Rename option in right click menu. 

VB Script for Creating New Folder

Here is a sample VB Script code for creating new directory.
The code will launch a dialog box for input as directory name. If you pass correct name and press OK, directory will get created.


Option Explicit
Dim objFSO, objFolder, strDirectory
strDirectory = InputBox("This is the the input box will say") 
if(0 = StrComp(strDirectory, "")) Then
WScript.Quit
End If
Set objFSO = CreateObject("Scripting.FileSystemObject")
Set objFolder = objFSO.CreateFolder(strDirectory)
WScript.Echo "Directory : '" & strDirectory & "' created sucessfully."
WScript.Quit 

Golang: Http POST Request with JSON Body example

Go standard library comes with "net/http" package which has excellent support for HTTP Client and Server.   In order to post JSON ...